Saturday, June 30, 2012

The Ol' Faithful of Pie Crusts

I am not sure why people are so scared of making a pie crust. It is super easy, forgiving, and tasty! Here is the basic recipie for a standard pie crust. The best part about this recipie is that it is easily doubled and can be frozen for up to 3 months. I would wrap the dough in plastic wrap then put into a Ziploc bag.

Basic Pie Crust
1 1/3 cups Flour
4 Tablespoons Butter (diced)
1/4 cup Crisco shortening
1/4 tsp. Salt (If using unsalted butter, use 1/2 tsp salt)
5 Tablespoons ice cold Water

*This makes a 9inch pie crust shell, so if you need a top and bottom just double it. I usually have some dough left over and just cook it with some cinnamon sugar on it for a snack!*


Step 1: Put the flour, diced up butter, Crisco, and salt in a bowl and begin mixing with a pastry cutter untill it turns into a sandy mixture. You can use a food processor to for this step. But it only takes a few minutes and a little elbow grease to get the job done.


Step 2: Put in your 5 Tablespoons of ice cold water. Mix untill the crumbs turn into a combined dough. After it is combined, take the dough and form it into a disc shape and wrap it in plastic wrap. Refridgerate for 15 to 30 minutes.


Step 3: After being chilled well, take the dough and begin rolling out on a floured surface. The dough is slightly sticky so make sure to rub the flour on the outside before rolling.


Step 4: Roll the dough back onto the rolling pin to assist the move to the pie plate. Cover the pie plate and lift crust up along outside edges to ensure there are no air pockets on the side. If the dough rips just patch it up! No one will notice and you can just say it is rustic. I like to leave a slight lip on this crust because it shrinks up a small bit. If you want to flute or crimp the edges be my guest. You can just go around the outside edge with a knife and cut the excess.


Step 5: For some recipies you need to microwave the crust- just microwave the crust for 4-7 minutes depending on your microwave strength. You will just have to touch the dough and decide when it begins to get a little crisp. As the dough cools it also sets up more. When using a microwave method it is SO important to prick the dough alot to ensure no bubbles form. When cooking in the oven just use what the recipie is calling for.

Helpful Hints
* Use a clear glass pie plate when microwaving so you can see the bottom cooking color*
* You may want to cover the exposed edges on the top with aluminim foil when baking in the oven for long periods of time.*


Sunday, June 17, 2012

Garlic Scape Pesto

So in my garden I grow a bit of garlic. I planted about 20 cloves and the cats dug some up so I am down to about 15 stalks that actually came through. So tis the season for garlic scapes to shine! I have already used some in roasted potatoes, boiled them with my mashed potatoes, and will be making a garlic scape pizza soon. My mother in law Peri had an abundance of them left so I combined mine and hers to make this garlic scape pesto recipe. I froze them in individual packs to pull out later for garlic bread or pasta.


In the middle you can see the garlic scape that I left on the plant to ensure that I know the time has come to harvest.

Garlic Scape Pesto
(All the ingredients can be altered in portion, just use your best judgement!)
1 cup nuts (pine or almonds or both)
3 cups of scapes cut into 3 inche pieces
Juice of 1 lemon
Generous pinch of salt and pepper
Loose handful of basil leaves


I start by cutting all f the flowering ends off. Then rough chopping the garlic scapes into about 3 inch long pieces.


Next I gather the pine nuts and almonds and toast them until fragrant and warm, which is about 4-5 min on low heat.


After the nuts are toasted and scapes are cut they go into a food processor with a cutting blade. Then add the juice of  1 lemon, a handful of fresh basil, and a generous pinch of salt and pepper.


Pulse the mixture 20 times to get it chopped up. Next stream in the olive oil until you get the desired consistency. My kitchen smelled amazing but my breath did not. I ended up eating some peanut butter to curb the taste on my tongue and then brushing my teeth and tongue twice before it finally started to go away.


For the final step I just ladeled in a spoonful of pesto into freezer bags. I folded the flap over in half and neatly stacked them so they froze flat. I did a larger portion, a few regular size, and some small ones for bread-that way I have some variety of portion.

Thursday, June 14, 2012

Baby Bess (BB)

My Jersey cow Bess finally had her baby on June 1st. Chris and I pulled it out in the field and she got to be with it all day out in the pasture. Baby Bess or BB is a boy so I was little disappointed we didn't have a  bloodline to continue, but rather just a piece of meat. Either way he is absolutely adorable.

The new chicken coop

My laying hens needed some more space, so I pulled a design of a coop from the internet and showed my dad. He shook his head, studied the photos, and then proceeded to write down everything he would need to buy fromm Menards. The end result was just perfect. The chickens love it too!


To the left are the nesting boxes from which I will start gathering eggs in October sometime. The window acts as a door as well as a light option. Below the window are two removeable pans/floor so I can clean out the droppings. The entire structure is over 6 feet tall so I fit perfect going in the door.


The inside view.


Below the house part. Their perch rail and feeder.


Going up the ramp to the inside!


Crazy hairdo man!

Angela's Shower Cake

My soon to be sister in law, Angela, was having a wedding shower. She asked me to make some mini cupcakes. I decided she needed a small cake to be a centerpiece. She loved it! It was a buttermilk chocolate cake with peanut butter buttercream. The flowers and outside decorations were made out of homemade vanilla fondant.


Meat birds

My meat birds are finally ready to be processed. Only 10 weeks later and we have meat! The chickens have been fed NatureWise 22% protein crumbles with a mix of crushed corn and oats too. No hormones or antibiotics for these birds!


My birthday cake and Party!

My husband sure does know how to pick out a birthday cake. He asked our friend Sarah to design a gnome cake with some of my additional animals. I saved the gnomes since they were made of fondant, they currently live in my gnome garden of indoor plants. Also included were ducks, my dog Maggie, and my cat Juuls.


ButterHead Lettuce

I picked my first butterhead lettuce crop of the season and she is a beauty. Perfect just like the ones growing in small backyard Switzerland gardens high in the Alps.


Ahhhh Wengen, Switzerland ...


Tuesday, May 8, 2012

The chicken tractor

The undertaking of raising 50 meatbirds is becoming quite a project. I wasn't prepared for all the work when they were younger. Partly because I didn't have the space to keep them and moving them into makeshift houses and the cold weather wasn't helping either. They moved into the chicken tractor about a week ago and they love it in there. They are 4 weeks old today! Most of them have their feather grown in.

This is called a "chicken tractor" in the poultry world. There are many different shapes and sizes, but this is the typical gist- it has wheels in the back so it can be moved daily, the back section pulls out and has a feeder, and the front has a section that hinges upward so one can place a waterer in it.

When moving the tractor you have to be careful not to start running the chickens over! I start off slow and they start to move forward then eventually run forward and I can pull it a space ahead to new grass. This morning I half ran one over- but it sqwaked and I investigated and got him out. No biggie he is fine. They are starting to get in routine when I move the tractor and begin coming forward on their own. They love living in here. Fresh open air and lots of room to run around. They mostly just lay down in the sunny area.

Monday, April 23, 2012

Annies Treasures

Mom and I just recently went down to Cascade, Iowa to go shopping at Born in a Barn and Annies Treasures. I was basically on a mission to find cute ideas for outside on the front porch. I really like the primitive look and decided to buy a long piece of wood with a oblong star cut out. Then I jazzed it up with a spring flower bouquet on top and a basket on bottom. I also found these super cute colorful glittery butterflies that were screaming my name. I bought 3 small ones and I might go back and get a few more of the small and large ones for decorating. I fell in love with them! Here is the finished product after some nailing and hot glueing.


Wednesday, April 18, 2012

Vanilla Bean Cheesecake

It was my Mom's birthday yesterday, so I decided to make her a birthday cake. Rhubarb is in season so I wanted to make a dessert using it. My new unused spring form pan was calling my name and begging to be used so I decided to make a vanilla bean cheesecake. Then I just took a jar of homemade strawberry rhubarb jam out of the freezer and use it as a compote for the topping. Here is the recipie.


Vanilla Bean Cheesecake

Crust : 2 cups of grahm cracker crumbs 
(one pkg plus 1/4 of another should be about right)  
3 T. sugar   
5 T. melted butter  

Filling : 24oz. cream cheese (3 bricks)
1 1/4 c. sugar
Pinch of salt
2 vanilla beans, scraped
3 whole eggs
1 c. sour cream
                            
Step 1: Preheat oven to 325 degrees. Crush grahm crackers. Combine sugar and melted butter and stir until a course wet sand texture. Grease a spring form pan. Press crust mixture into pan bottom and half way up the sides. Then bake for 10 minutes. Take out and put on cooling rack then start preparing the filling.

Step 2: Put the paddle attatchment on mixer. Soften cream cheese a bit in the microwave and then dump into mixer. Beat until soft and creamy. (Make sure to keep scraping the sides down periodically otherwise it will not all be smooth). Add sugar and salt, then mix well. Stop mixer and add in vanilla bean scrapings. Mix untill beans are combined in batter.

Step 3: Break one egg at a time into a bowl. Stop mixer and add only one egg at a time. Then after adding mix on medium speed for 1 minute. Then add 2nd egg, repeat one minute on medium speed. Then repeat for 3rd egg.  The mixture should be smooth and frappy. Add in sour cream and mix until combined on low speed.

Step 4: Pour into crust and bake for 1 hour and 15 minutes. The cheesecake will climb very high towards the end and will slightly jiggle in the middle when taken out of the oven. (Don't worry it will start to slowly collapse down after a bit). Set on a cooling rack to cool for an hour then move to refridgerator and cool for 4 or 5 hours. Cover with plastic wrap after completely cooled.

Step 5: You can use whatever you would like to a topping. Chocolate syrup, peanut butter, caramel, candy bars, fresh fruit, jam, honey, really anything will work! I covered mine with a jar of homemade strawberry rhubard jam that I took out of the freezer.


*Side Note: Don't throw away the used vanilla bean pods, throw them in a baggie or plastic container and cover them with some sugar. Let them sit in that and it will create vanilla sugar. It is awesome to sprinkle on oatmeal, coffee, or even breakfast ceral. Enjoy!

Tuesday, April 17, 2012

Indian Runner Ducks

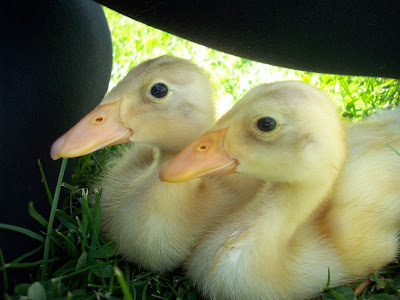
I absolutely love my ducks. Their webbed feet, their quack, and how they stand up super tall. These ducks are not made to waddle but rather to run fast and be herded easily. These ducks are used alot in Asian culture. They are extremly good egg layers and foragers. I try and take them out once or twice a day so they get use to being handled and so the dog gets use to seeing them. Maggie and Juuls both love them.


 They love eating dandelions!

Raising Chickens

I recently invested in a batch of 50 chicks and 2 ducks. The chicks are Cornish Rock crosses and the two ducks are Indian Runner. They are a week old today and are all doing well! They have doubled in size due to their unending hunger and thirst. I give them food 3 times a day and fill their water at least twice a day. I am trying to devise a new area to keep them in. I definately did not expect them to grow this fast. Either way they are still adorable. The chicks will be ready to butcher in 8 to 12 weeks from start to finish and the two ducks will be pets. Here is a few pictures of where I am keeping them.

We keep a heat lamp on them 24 hours a day. Sometimes I have to move it up or down depending on how warm it is outside.


The ducks and chicks seem to get along just fine. They all love to eat!

Thursday, January 12, 2012

Vanilla Bean Marshmallows


I originally found this post on another blog that I follow regularly called My Baking Addiction. Her version of the marshmallows did not involve vanilla beans so I used them instead and found some other tricks helpful that were not in the directions.

Vanilla Bean Marshmallows
3/4 cup water, divided
3 (.25 ounce) packages unflavored gelatin
2/3 cup light corn syrup
2 cups white sugar
2 vanilla beans or1 tablespoon *WHITE vanilla extract
1/4 cup cornstarch
1/2 cup confectioners' sugar

Step1: Pour about half of the 3/4 cup of water into a bowl of a stand mixer. Add in 3 packages of gelatin and let it sit while it sets up and absorbs the water. (Make sure to put the whisk attachment on the mixer).

Step 2: Pour the rest of the water into a sauce pan and add in the white sugar and corn syrup. Bring the mixture to a boil over medium heat and stir frequently to make sure it doesn't burn. Boil rapidly for 1 minute.

Step 3: While the mixture is coming up to a boil, slice the length of the vanilla bean open and scrape out with a spoon tip or knife. Do this with both beans and then drop the insides into the gelatin mixture. (If you are looking for another purpose for the used vanilla bean pods, just throw it into a Ziploc bag or container with some white sugar and let it rest for a few days up to a month to create your own vanilla sugar-it is amazing).

Step 4: After the mixture has boiled for 1 minute, let it cool for another minute to take the edge off. Carefully pour the mixture into the mixing bowl and begin mixing on low for a few seconds to combine then crank it up to high for about 15-18 minutes or until stiff peaks form. (If you are choosing to use vanilla extract then add it in towards the end just enough time to get it combined.)

Step 5: While everything is being whipped, take 2 sheets of plastic wrap and spray it liberally with nonstick cooking spray. Use a 9 x13, a 9x9, or a 9x11 pan for your set. Lay one of your sprayed plastic wraps in it and press into corners.

Step 6: After the stiff peaks have been reached, work fast and dump the marshmallow fluff into the pan. Spread out evenly into all the corners and try to even out the top as much as you can, but do not fret if it isn't perfect-that is the beauty of homemade and not processed marshmallows :) Cover it with the other plastic wrap oil side down. Let them set up for 4+ hours on your counter.

Step 7: Combine the cornstarch and confectioners sugar. Liberally sprinkle some on the cutting board. Used a greased knife to cut marshmallows into whatever shape you would like. After cutting a few roll around in the sugar cornstarch mixture to coat them enough so they aren't sticky. Set aside on a sheet pan.

Step 8. Take a few marshmallows at a time and put in a strainer/colander to shake off the excess powdered sugar. Repeat process until all are shaken. Store in an airtight container. (I prefer to use glass Mason jars).


The end result is delicious. These melt in your mouth and hot cocoa. Enjoy!